The main menu
Goal: build the menu at the top of every page. You add pages and your own links, change the order, and put items inside other items.
Who this is for: shop owners and editors. You do not need any technical knowledge.
Time: about 10 minutes.
This is chapter 8 of Build a ceramics shop, step by step.
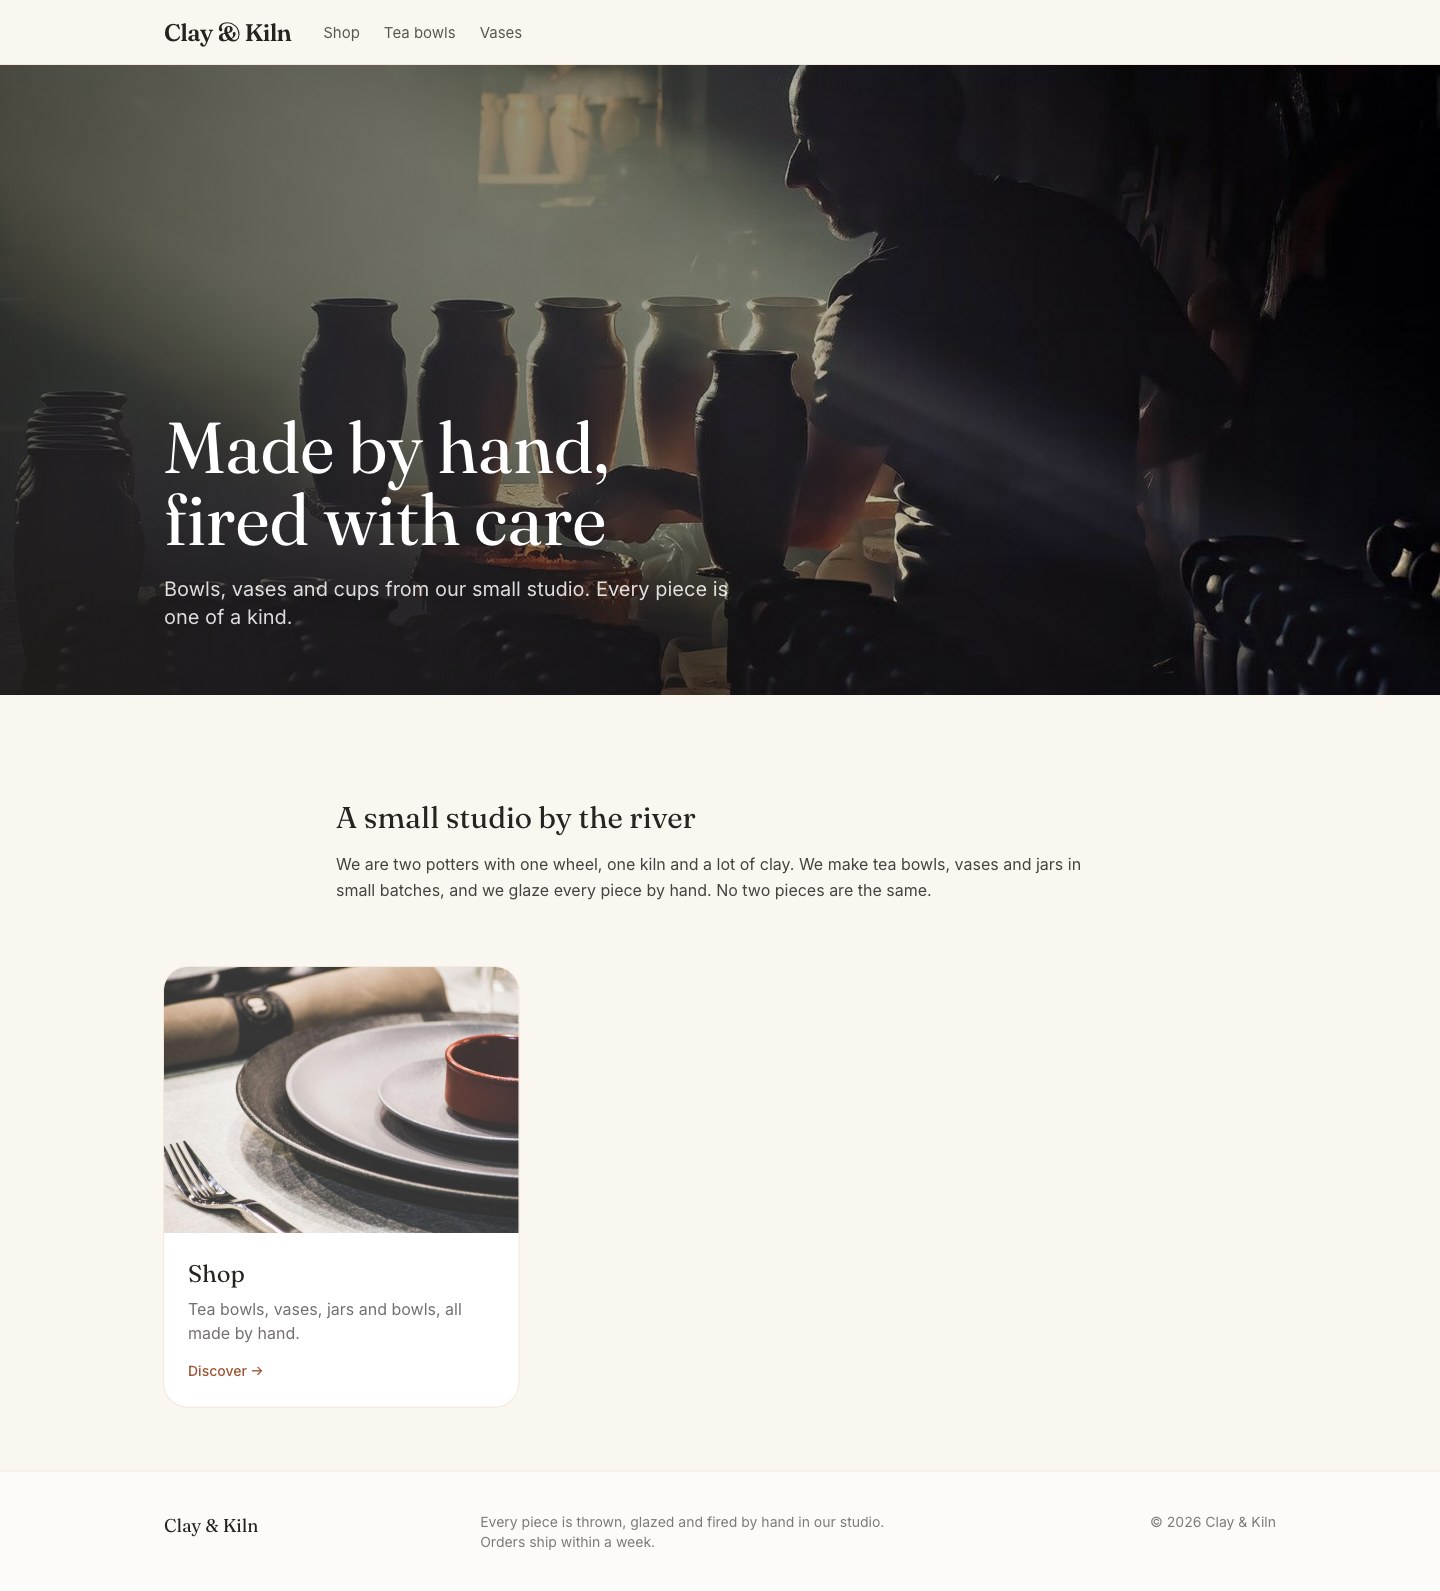
Before you start
Words you will see
| Word | What it means |
|---|---|
| Menu | A list of links. A site can have many menus, for example one at the top and one in the footer. |
| Menu slug | The inside name of a menu, for example main. The site's design looks for a menu by this name. |
| Page item | A menu item that links to a page of your site. When you change the page's address, the link changes too. |
| Custom link | A menu item with an address you type yourself, for example a link to one group on the shop page, or to another website. |
| Nest | Put an item inside another item. Visitors see it as a sub-item. |
Steps
1. Make a new menu
In the menu on the left, click Navigation.
- In Slug, type
main. - In Display name, type
Main menu. - Click + New menu.
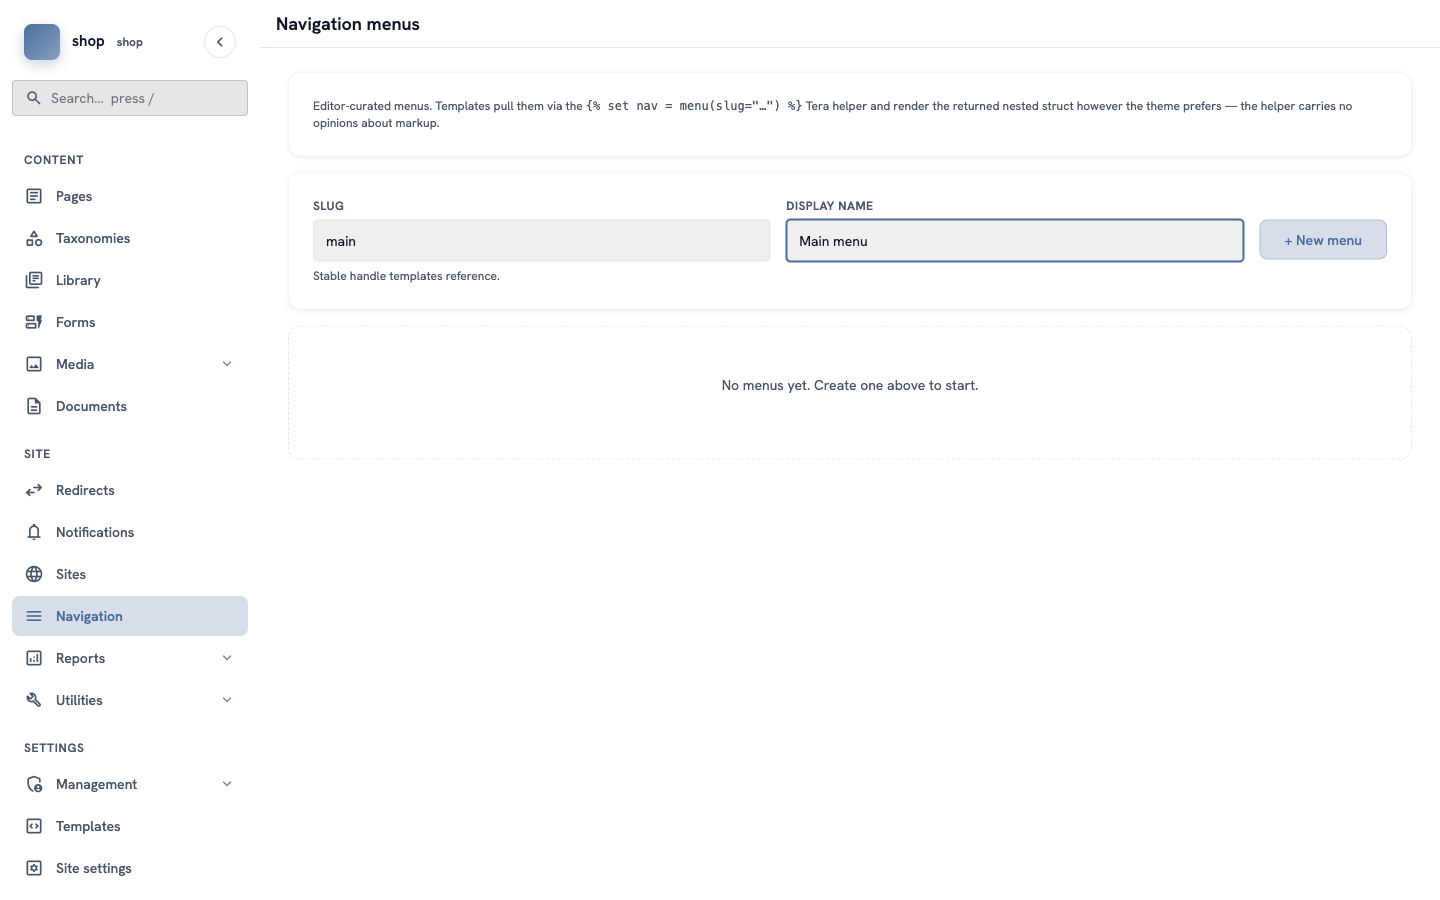
Important: the slug must be
main. The shop's design shows the menu with this slug at the top of every page. If you are not sure which slug your design uses, ask a developer.
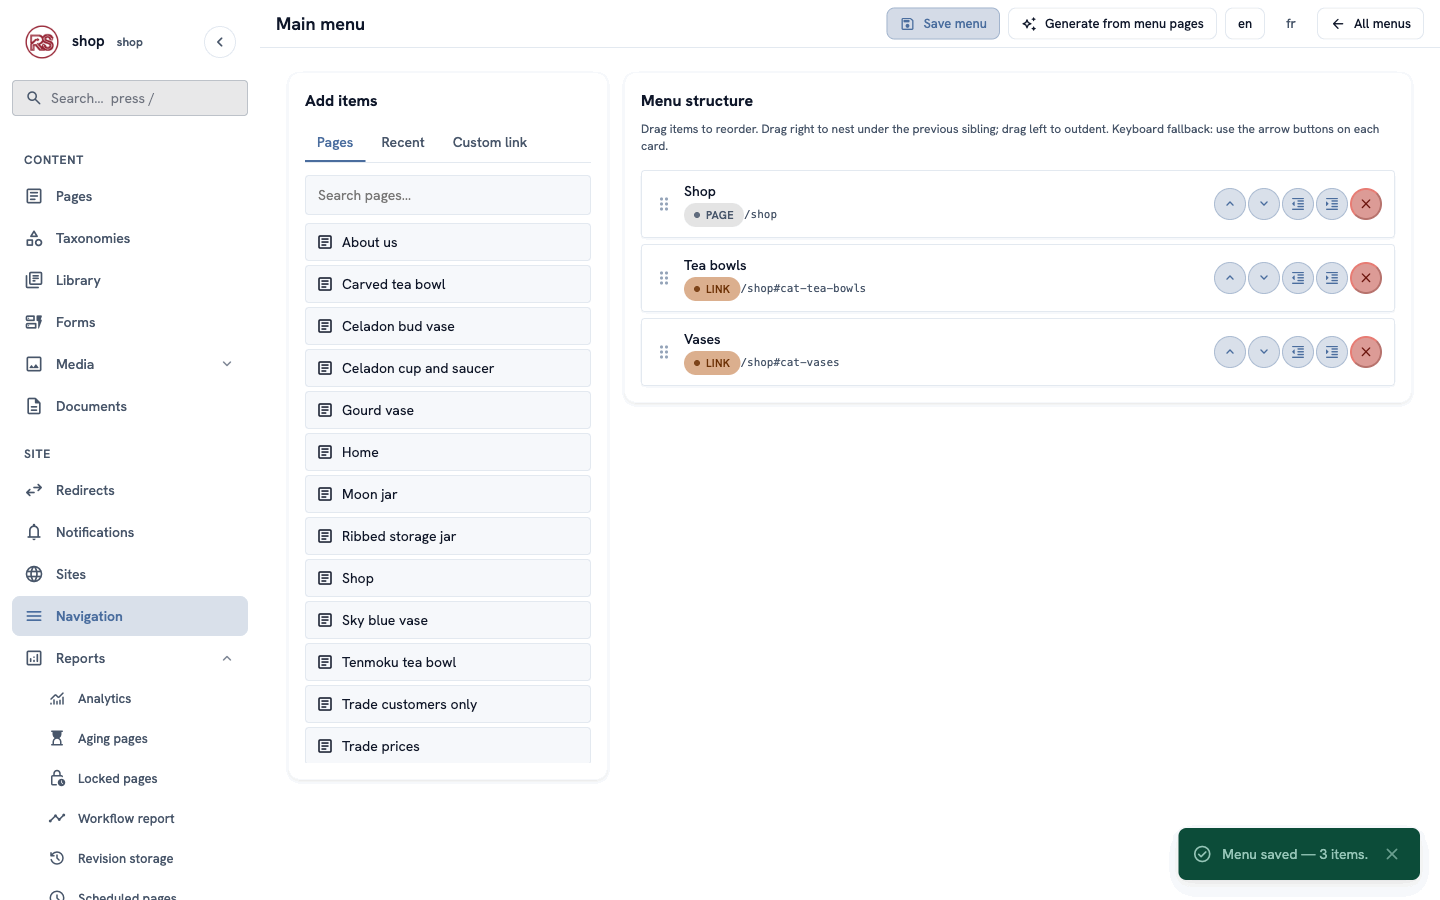
The menu builder opens. On the left you add items. On the right you see the menu structure.
2. Add a page
On the left, the Pages tab lists all pages of your site. Type in Search pages… to find a page quickly.
Move the mouse over Shop and click the + button. Shop is now on the right, with the label PAGE and its address /shop.
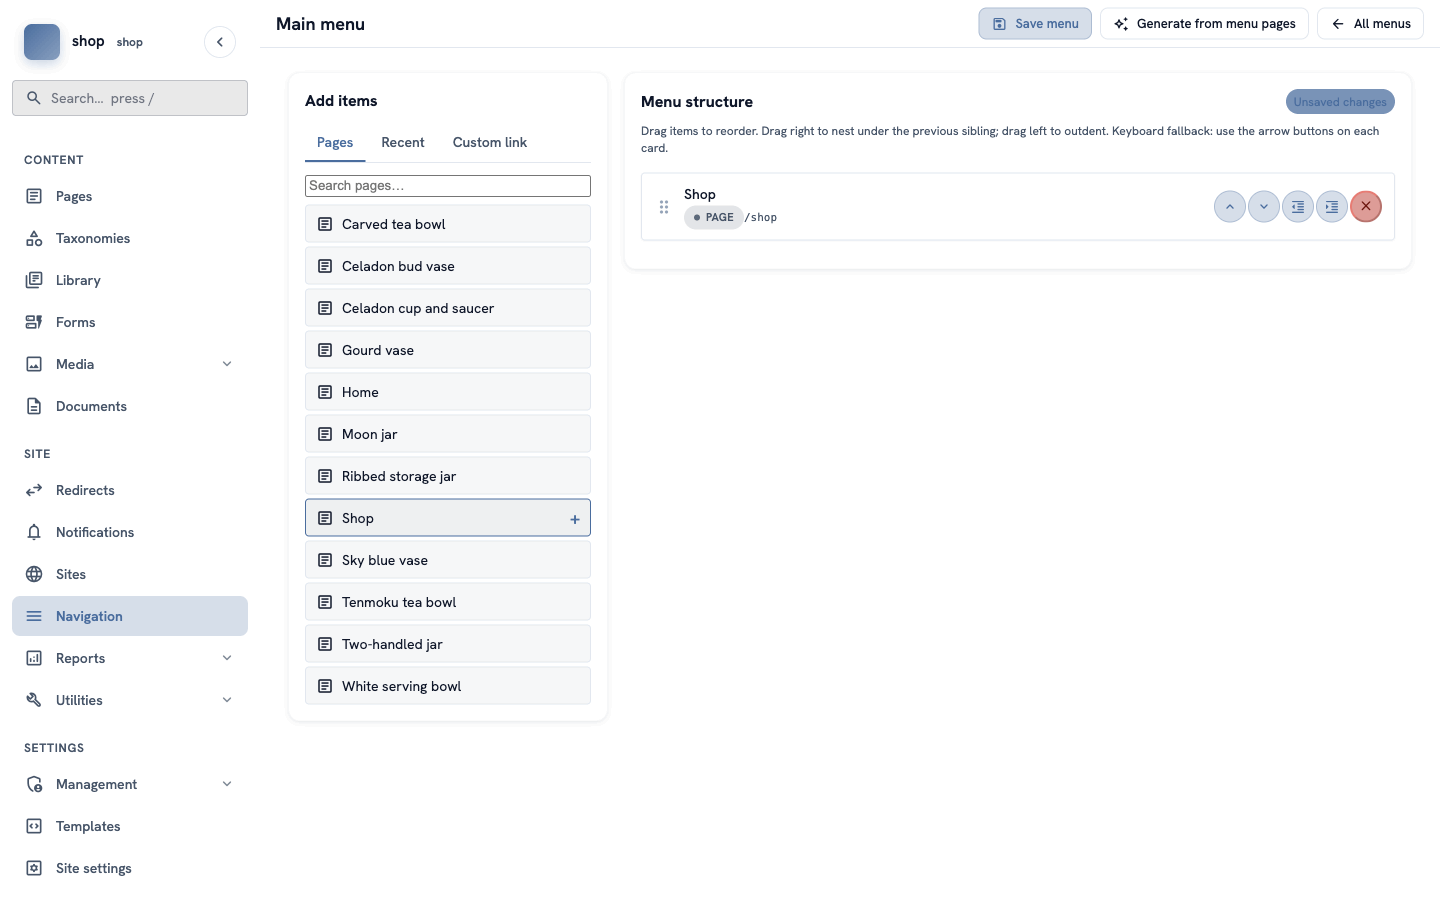
Tip: the Recent tab shows the 20 pages you changed last. It is handy after you publish a new page.
3. Add links to one group
Visitors like to jump straight to the tea bowls. Each group on the shop page has its own address: /shop#cat- and then the category slug from chapter 5.
- Click the Custom link tab.
- In URL, type
/shop#cat-tea-bowls. - In Label, type
Tea bowls. - Click Add to menu.
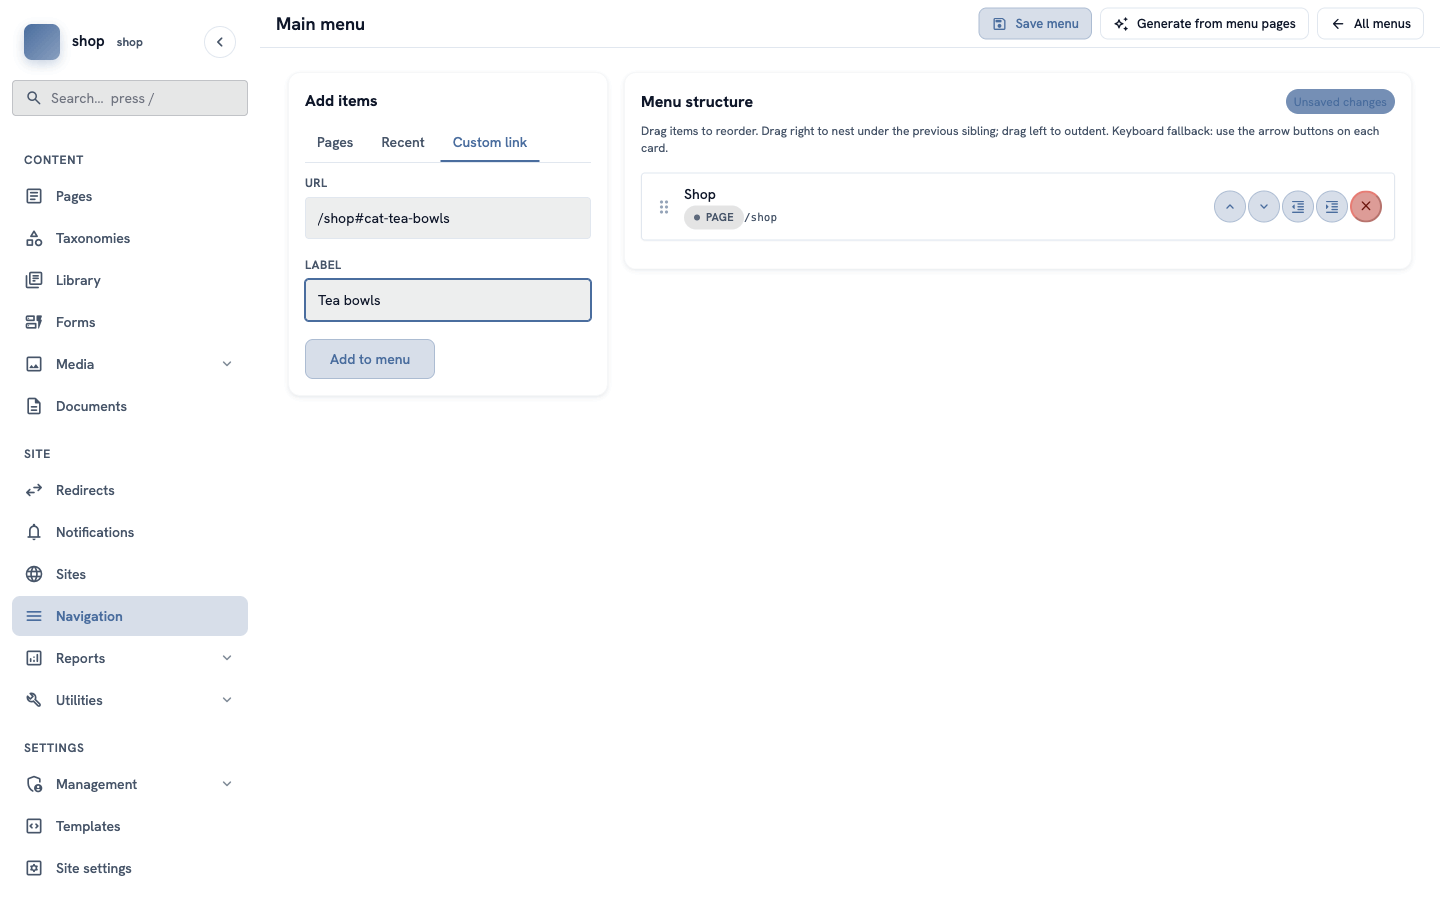
Do the same for the vases: URL /shop#cat-vases, label Vases.
Custom links have the orange label LINK. You can also use them for other websites, for example
https://instagram.com/your-studio.
4. Change the order, or nest items
Each item on the right has five round buttons:
| Button | What it does |
|---|---|
| up / down arrows | Move the item up or down. |
| outdent (lines with an arrow to the left) | Take the item out of its parent. |
| indent (lines with an arrow to the right) | Put the item inside the item above it. |
| red × | Remove the item from the menu. The page itself stays. |
You can also drag an item by the dots on its left. Drag it right to put it inside the item above; drag it left to take it out.
For example, to show Tea bowls and Vases as sub-items of Shop, click the indent button on both.
The example shop keeps all three items on one level. Its simple design shows only the first level. Sub-items need a design that can show them — ask a developer.
5. Save the menu
The label Unsaved changes tells you that the menu is not saved yet. Click Save menu at the top.
A green message says Menu saved — 3 items.
Check it worked
Open any page of your site. The menu is at the top, next to the shop name. Click Tea bowls — the shop page opens at the tea bowls.
On the shop page and on product pages, Shop is shown in bold and in the accent colour, so visitors know where they are.
More things you can do
Make a menu from your pages in one click
Every page has a box Show in menus on its Promote tab. Click Generate from menu pages at the top of the menu builder. The menu is filled with all published pages that have this box ticked, in the same order and nesting as in Pages.
Careful: this removes the items that are in the menu now. Use it for a new menu, or when you want to start again.
Translate a menu
When your site has more than one language, the menu builder shows a button for each language at the top, for example en and fr. Click a language to type the labels in that language. If you leave a label empty, the site uses the normal label — or, for a page item, the translated page title.
The chapter "A second language" (coming soon) shows this step by step.
More menus
Go back to Navigation (click All menus) and make another menu, for example with the slug footer. A developer adds it to the design — see Show menus and settings in templates.
If something goes wrong
| Problem | What to do |
|---|---|
| The menu is not on the site. | Check the slug: it must be main. Check that you clicked Save menu. |
| A link to a group does not jump to the group. | Check the category slug in Taxonomies → Categories. The URL is /shop#cat- + the slug, for example /shop#cat-tea-bowls. |
| You closed the builder with Unsaved changes. | Your last changes are lost. Open the menu again and repeat them. |
| A page is missing from the Pages tab. | Type its name in Search pages…. |
Next
Developers: see also Show menus and settings in templates.