Make a "Product" page type
Goal: decide which boxes every product has — a price, a glaze, a photo and a description. You do this in the admin, without code.
Who this is for: shop owners and site managers. You do not need any technical knowledge.
Time: about 15 minutes.
This is chapter 4 of Build a ceramics shop, step by step.
Before you start
- You did chapters 1 to 3.
- You can see Utilities → Page types in the menu. If you cannot see it, ask the person who manages your site.
Why a new page type?
A page type is like a paper form. The form decides which boxes an editor fills in. The shop already has page types for the home page and the shop page. For products you make your own type, with exactly the boxes a product needs. Later, every product page has the same boxes, and every product looks the same on the site.
Words you will see
| Word | What it means |
|---|---|
| Page type | The kind of page and its boxes. |
| Field | One box on the form, for example Price. |
| Widget | The kind of box: a number, a list to choose from, a photo, a text with formatting… |
| Key | The inside name of a field, for example price. Visitors never see it. Only small letters, numbers and _. |
| Allowed parent types | Where pages of this type can go. Products can only go under the shop page. |
| Publish (a page type) | Makes the new boxes ready for editors. Before that, your changes are only a draft. |
Steps
1. Open the page types
In the menu on the left, click Utilities, then Page types. You see the types your site already has.
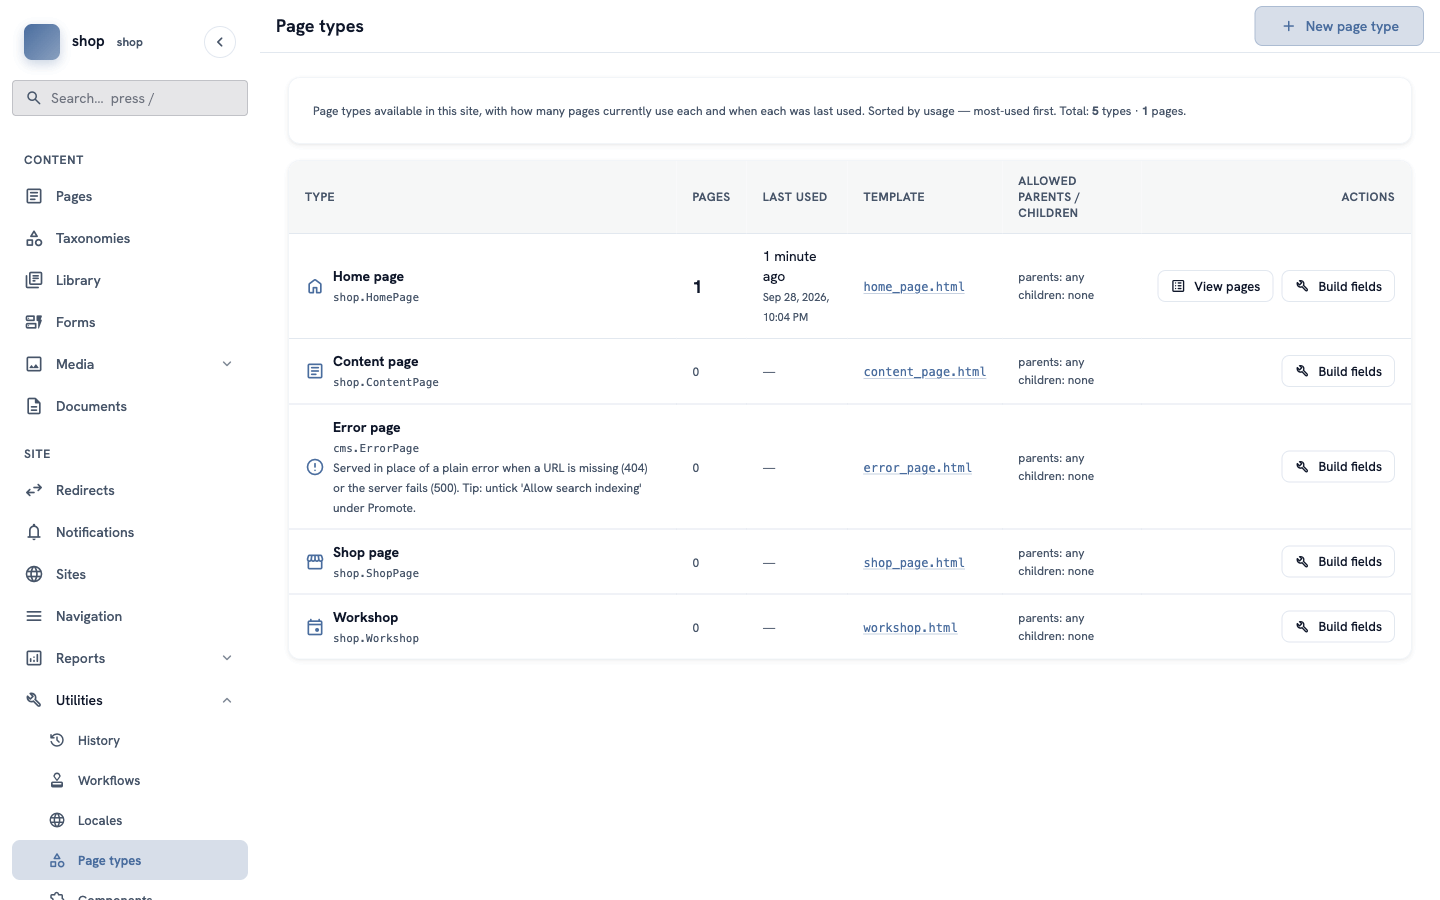
Click + New page type at the top right.
2. Name the new type
Fill in the form:
| Box | What to type |
|---|---|
| Name | Product |
| Identifier | product (letters, numbers and _ only, no spaces) |
| Allowed parent types | ShopPage |
| Allowed child types | leave empty |
| Workflow | keep None — publish directly |
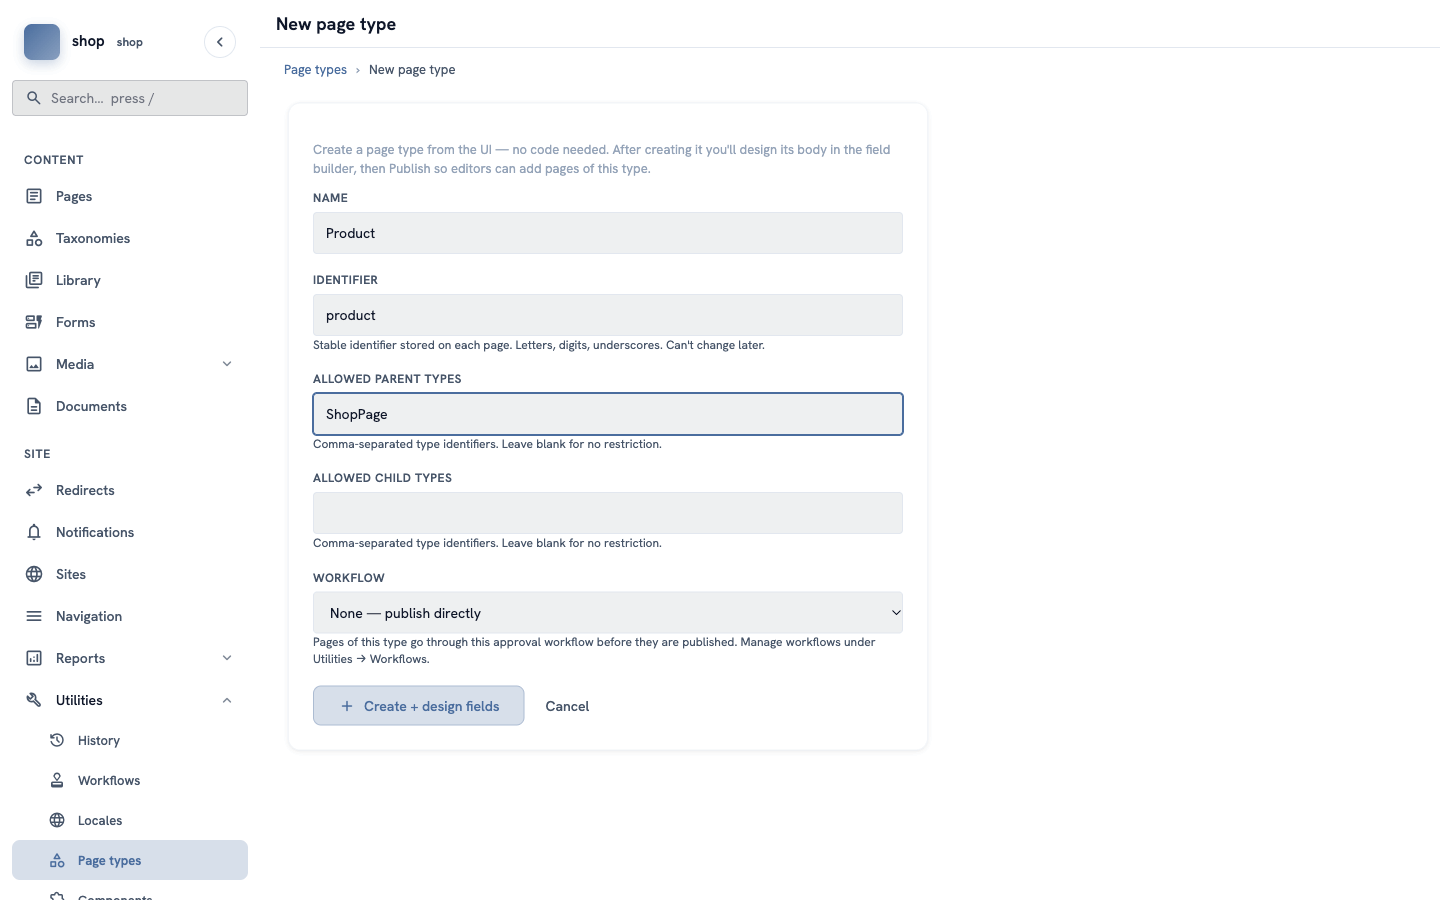
Important: you cannot change the Identifier later.
What is
ShopPage? It is the identifier of the Shop page type. You can see all identifiers in the Page types list, under each name (for exampleshop.ShopPage— use the part after the dot).
Click + Create + design fields. The field builder opens.
3. Add the price
Click + Field. A list of widgets opens. Click number.
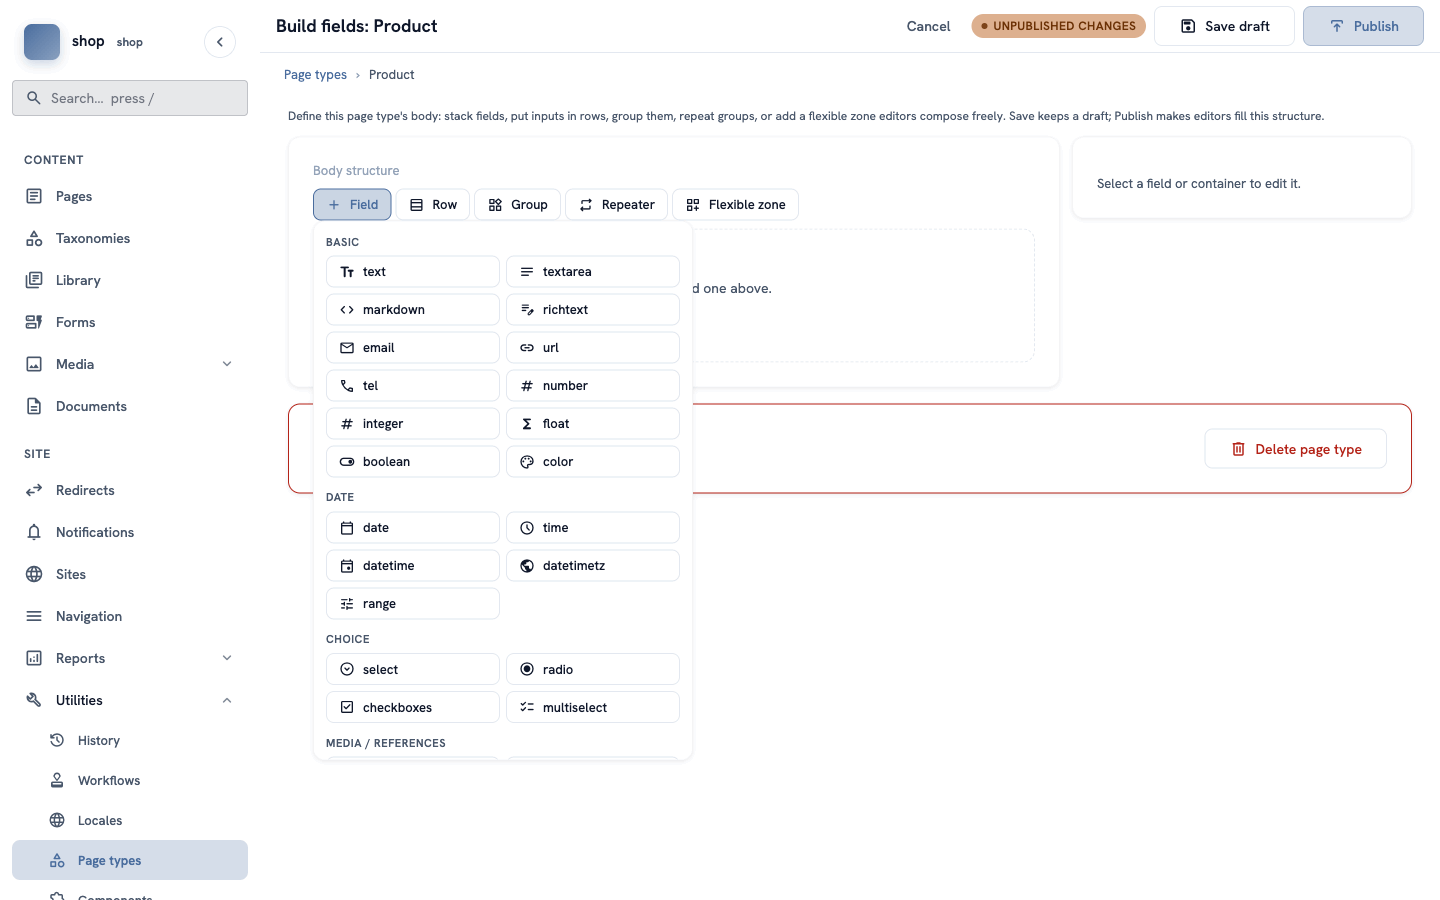
A new field is in the list. On the right, fill in Edit field:
- Label:
Price - Key:
price - Help text:
The price in euros, for example 45.
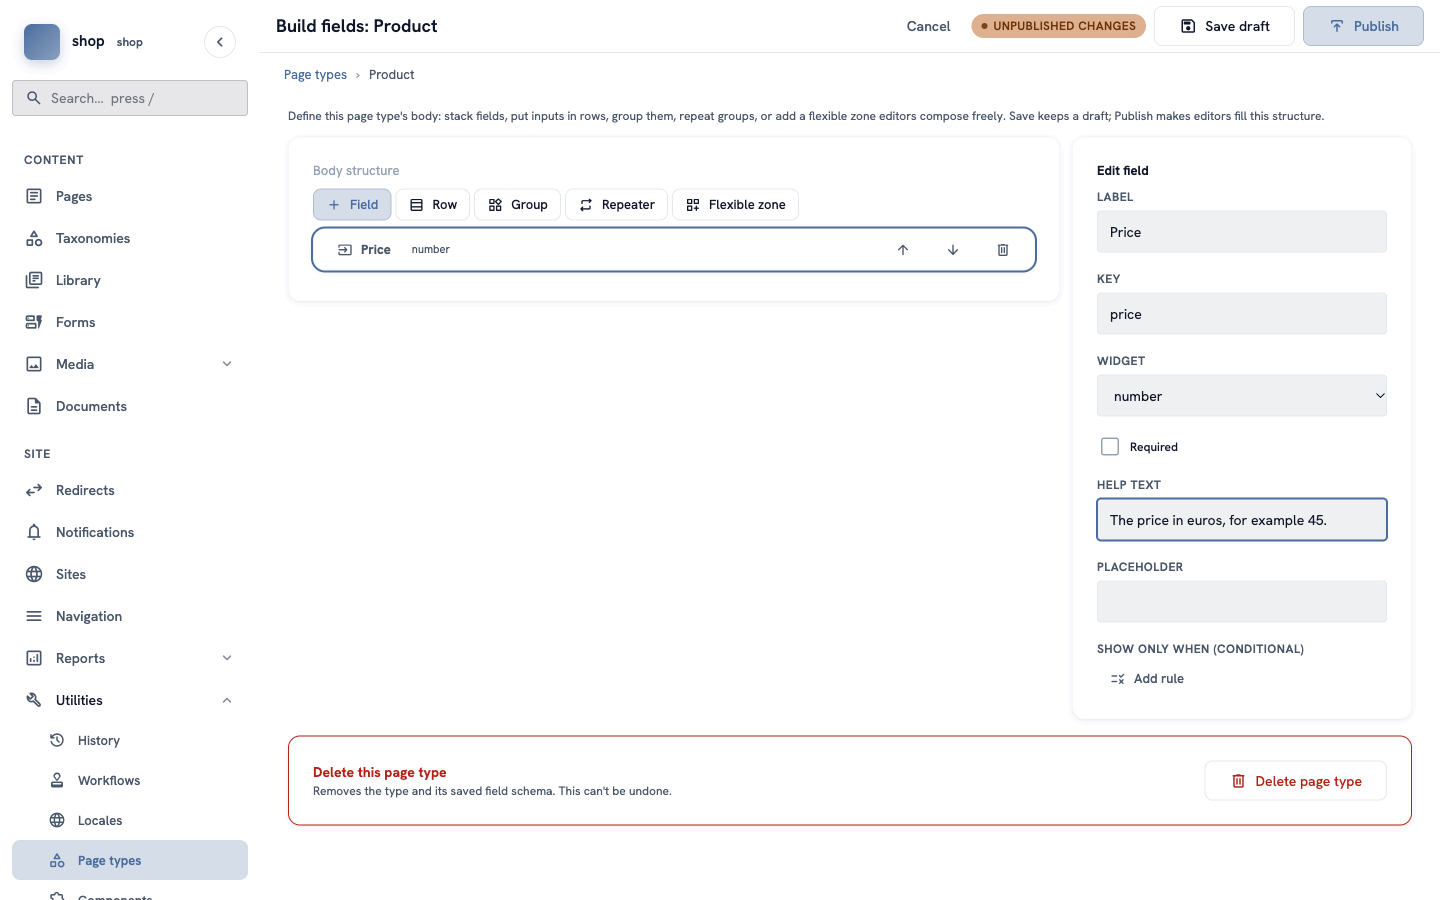
Tip: the help text shows under the box when an editor adds a product. Short help saves many questions.
4. Add the glaze
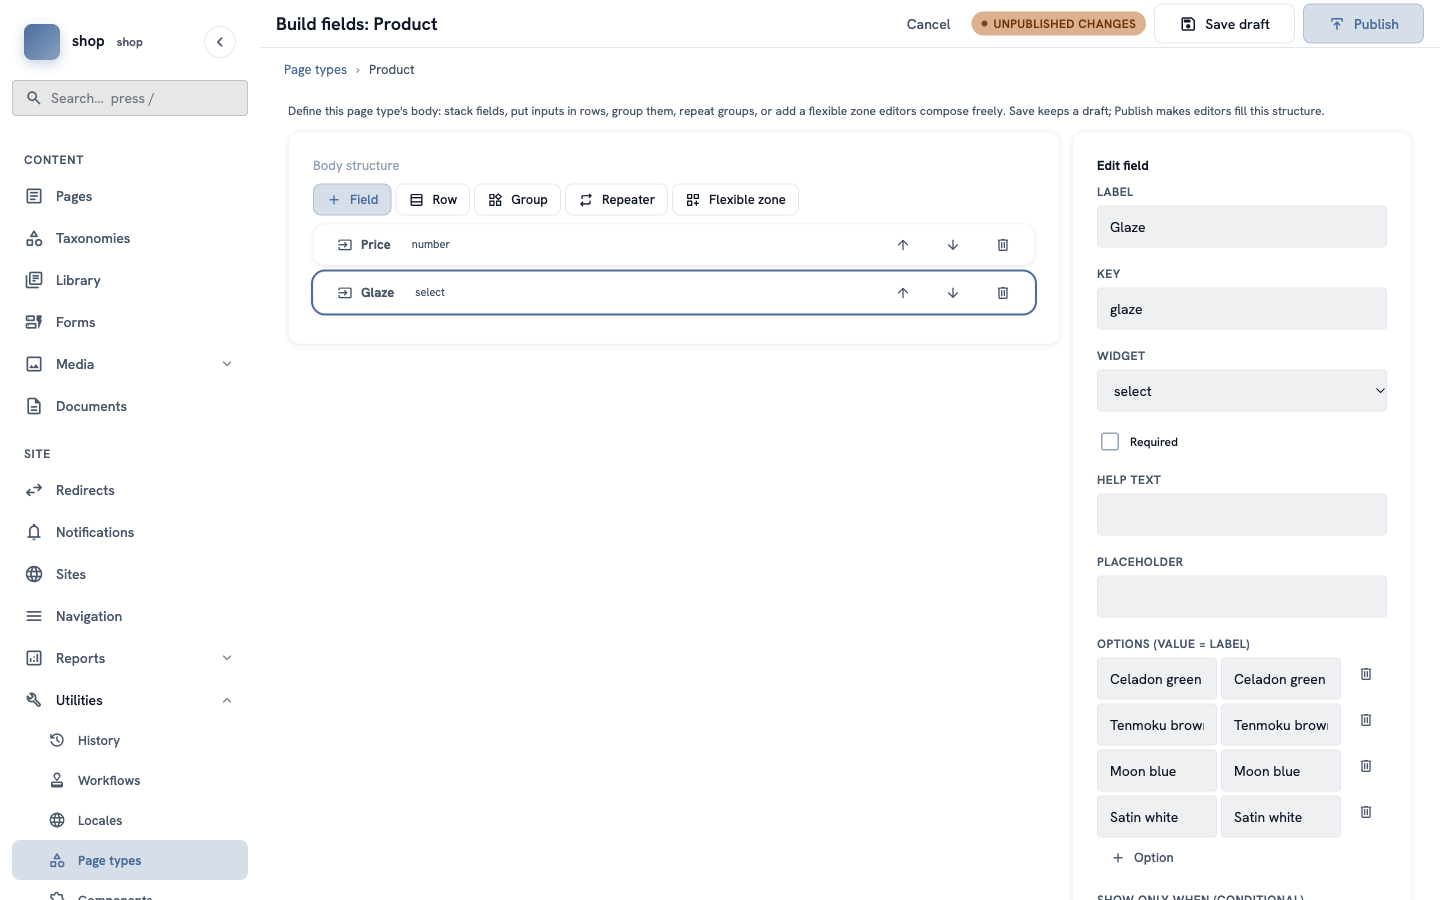
Click + Field and choose select (a list to choose from).
- Label:
Glaze - Key:
glaze
Under Options, click + Option for each glaze. Each option has two boxes: the value (saved inside) and the label (what people see). For the example shop, type the same words in both boxes:
Celadon greenTenmoku brownMoon blueSatin white
5. Add the photo and the description
- Click + Field and choose mediapicker (it is in the group Media / References at the bottom of the list). Label:
Photo, key:photo. - Click + Field and choose richtext (text with bold, lists and links). Label:
Description, key:description.
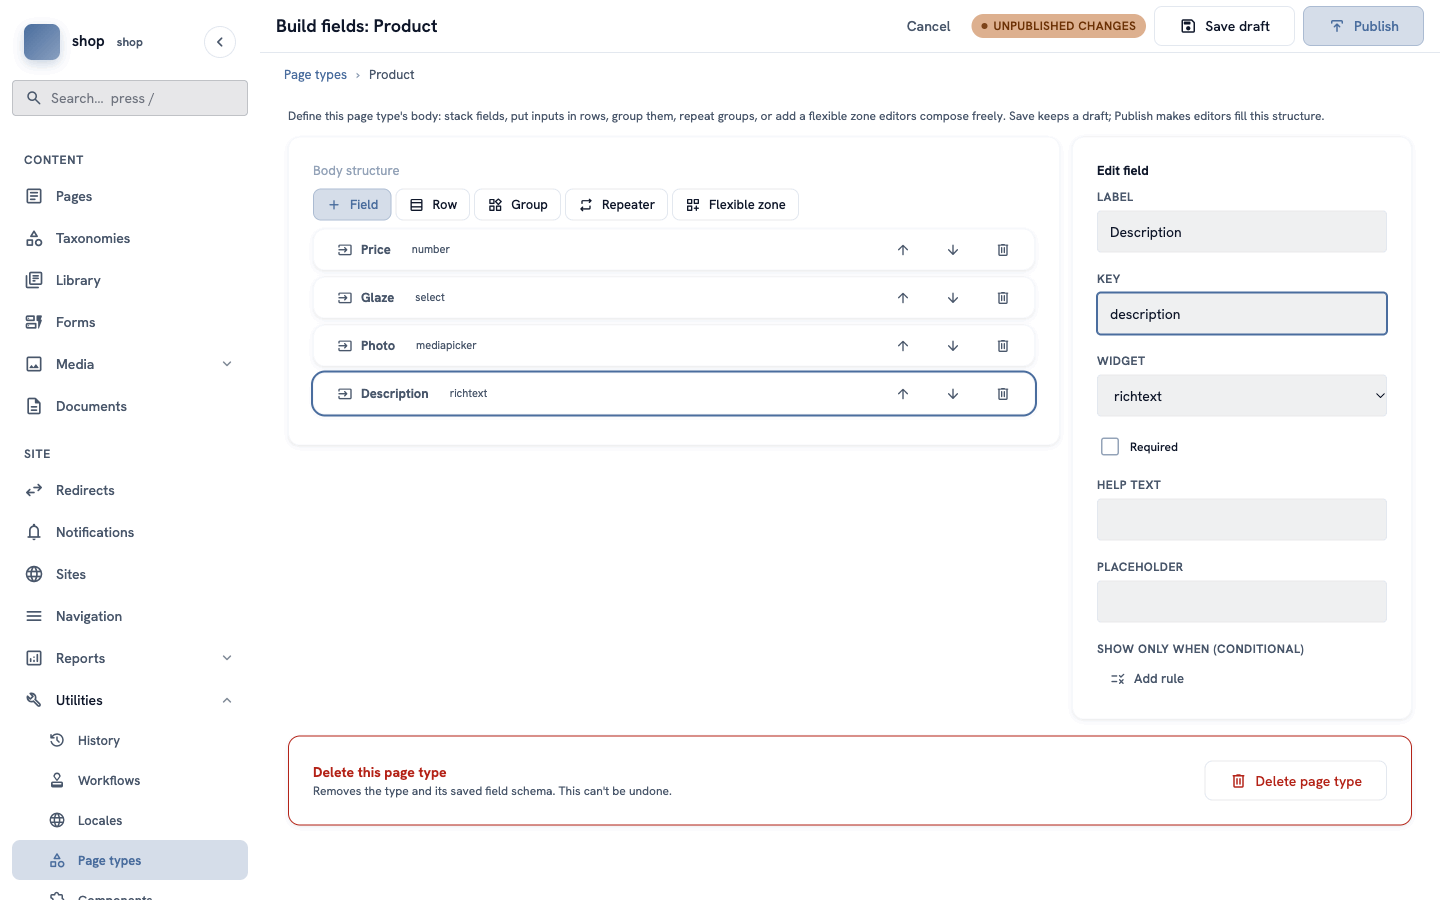
Wrong order? Use the up and down arrows in each row. The trash button removes a field.
6. Publish the type
Click Publish at the top right.
A green message says Schema published — the page editor now uses this structure. The orange Unpublished changes label is gone.
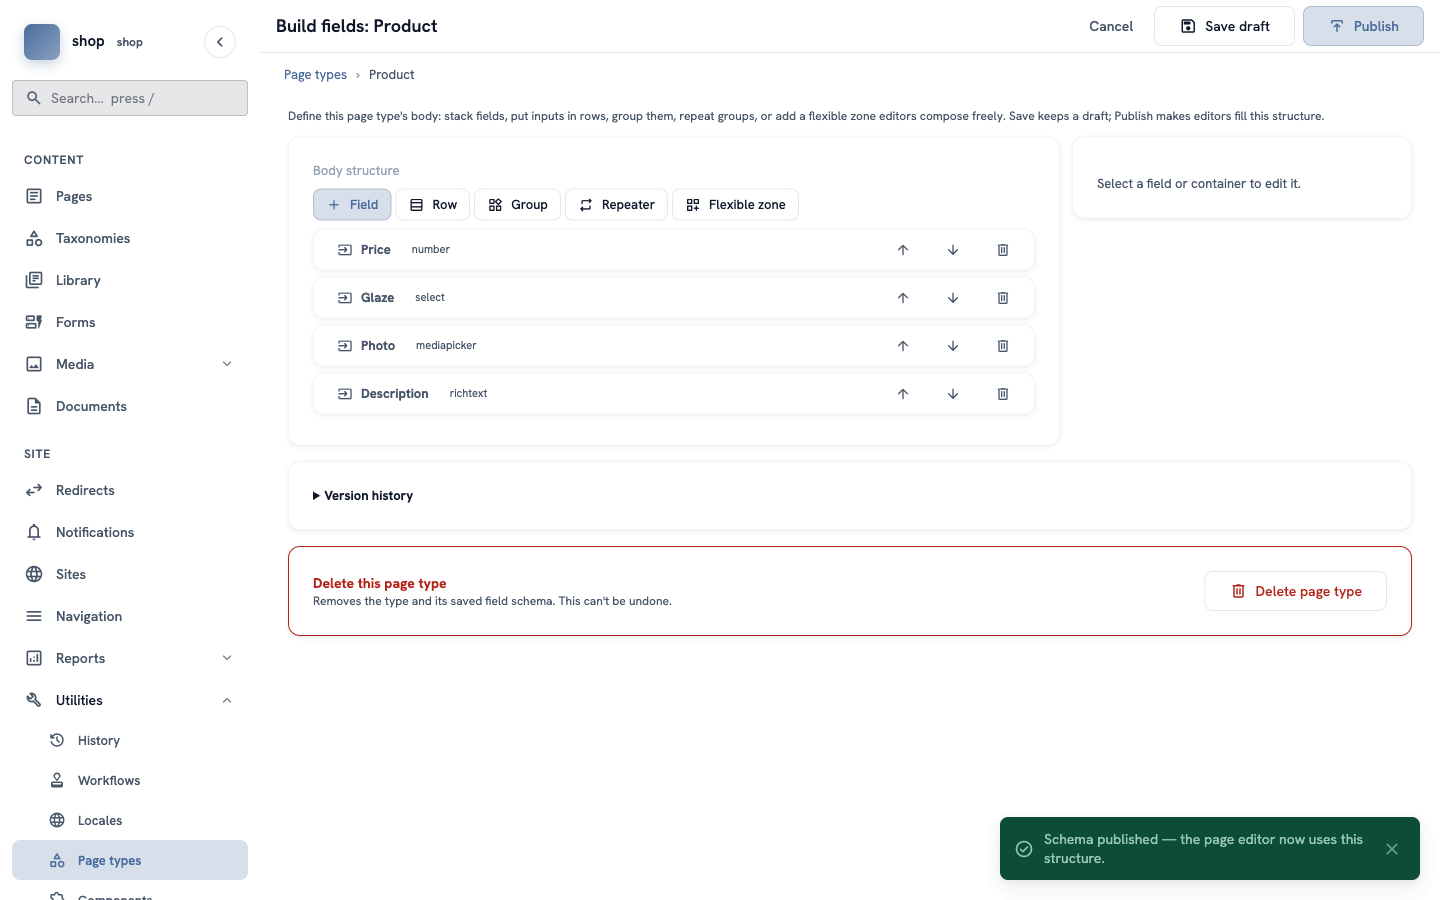
Save draft or Publish? Save draft keeps your work, but editors do not see it yet. Publish gives the new boxes to editors. You can change the fields later and publish again. Under Version history you can see the older versions.
7. Choose how product pages look
A template decides how a page looks on the site. Go back to Page types. In the Product row, click the name in the Template column.
Choose the template for products and click Save. In the example shop, it is product_page.html.
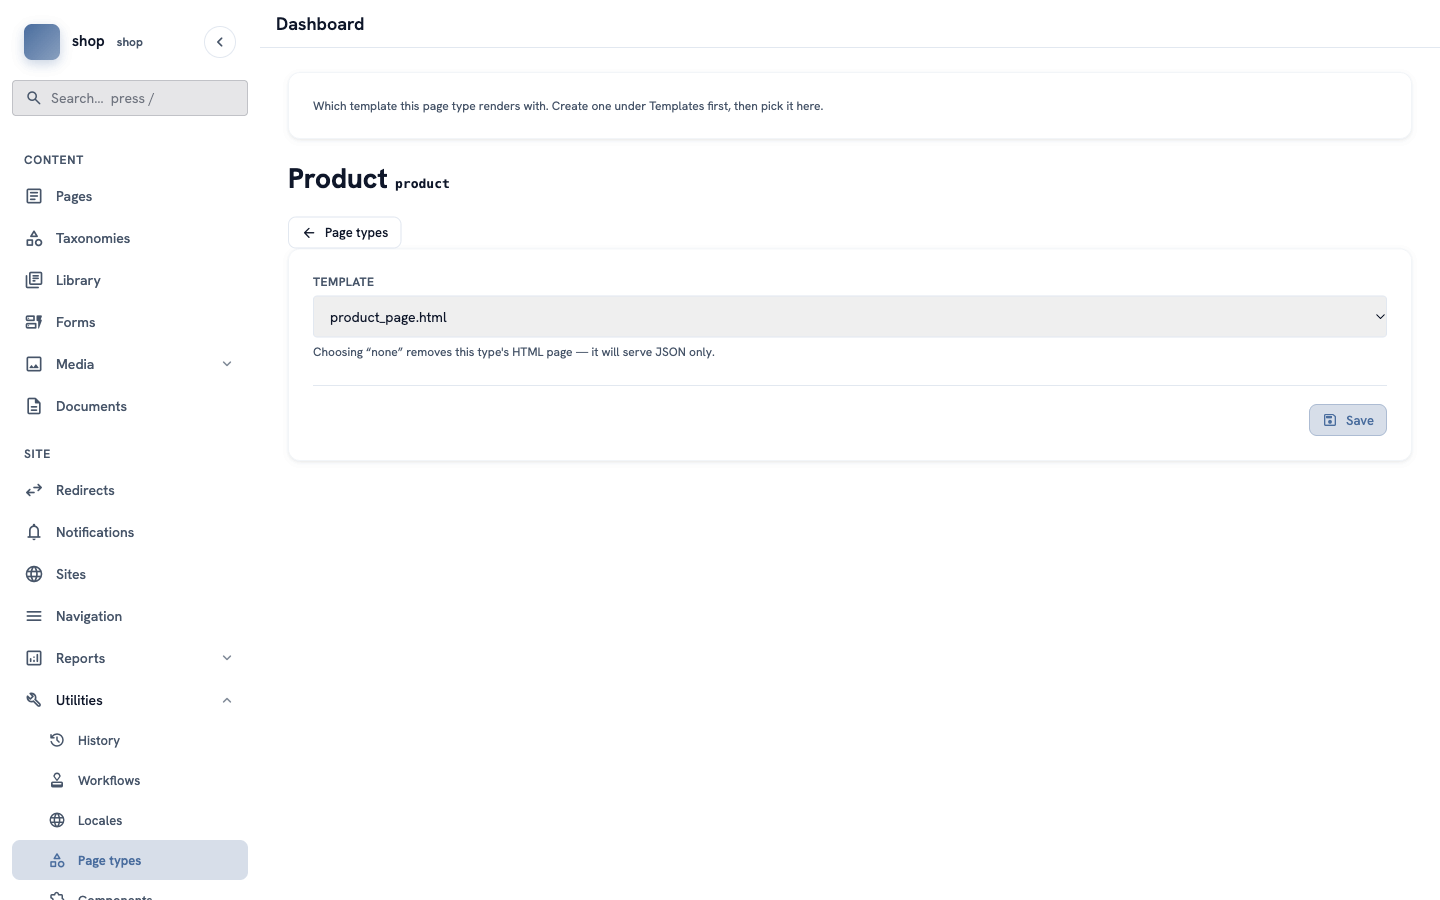
No special template? Keep the one that is selected. It shows all the product's fields in a simple layout. A developer can make a nicer template later — see Show menus and settings in templates.
Check it worked
- In Page types, there is a new row Product, with
parents: ShopPage. - In the next chapters, when you add a page under the shop page, Product is in the list of types.
If something goes wrong
| Problem | What to do |
|---|---|
| Product is not in the list of types when you add a page. | The type is not published, or the page is not under the shop page. Open Build fields for Product and click Publish. |
| A field key shows an error. | Use only small letters, numbers and _, and start with a letter. Each key must be different. |
| You want to delete the type. | Open Build fields and click Delete page type at the bottom. This cannot be undone. |